The Enrollment Confirmation System is a web-based tool where undergraduate, graduate, and professional admitted students can confirm their intent to enroll at the University of Washington and pay their Enrollment Confirmation Deposit (ECD) using a credit card or web check.
There are two administration portals for the Enrollment Confirmation System. There is an Inquiry View and an Update View. Please contact the Office of the University Registrar to request access to the Update View. The staff that currently have access to the 160 screen will receive access to the Administration Update View Portal from the Office of the University Registrar. Please contact the Registration Team to request access to the Inquiry View.
ECS Administrative Portal
Step 1: Access
Log in using UW NetID and password, as well as Duo two-factor authentication.
Step 2: Begin Confirmation
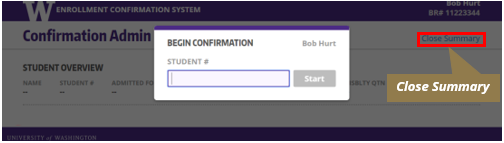
Enter the student’s number to begin the confirmation process. The Start button will become enabled after entering the seven-digit student number. Return to the Begin Confirmation screen at any time by selecting Close Summary located in the upper right-hand corner.
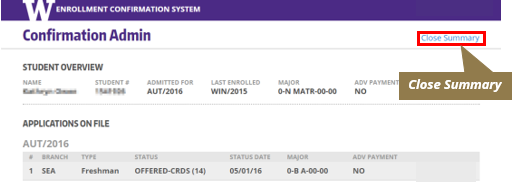
Step 3: Admin Inquiry Student Overview
The Admin Inquiry Student Overview displays the overview of the student and the status of the student’s application.
Step 4: Admin Update Student Overview
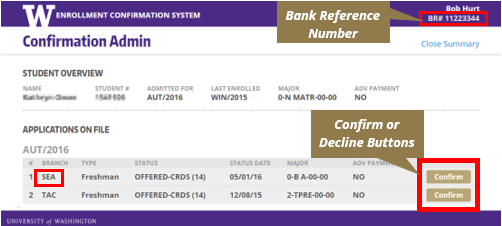
The Admin Update View is similar to the Admin Inquiry View except the Confirm and Decline buttons and the Bank Reference Number (BRN) are present.
If the student has multiple applications, select Confirm for the appropriate application. In this example, we’ve chosen to confirm the student’s Seattle first-year application.
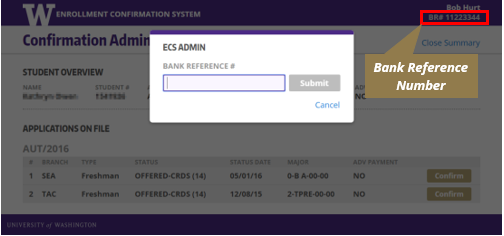
To change the BRN, click the BRN number in the upper-right corner. This will open a dialog box to enter in the new BRN. The BRN is used for check or wire transfers. The Submit button will be enabled after the BRN is entered.
Step 5: Method of Payment
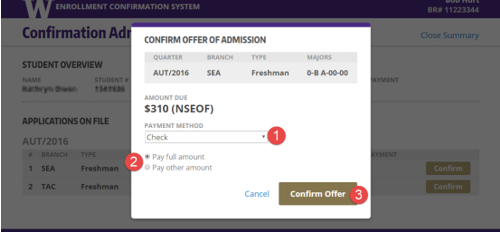
- Select the preferred payment method. Possible methods of payment are check, defer payment, and wire transfer. Taking a check requires that the user enters a BRN.
- Select either Pay Full Amount or Pay Other Amount. If selecting Pay Other Amount, an update field will appear under the selection where users can enter the alternative payment amount. The Pay Other Amount option should only be used if a wire transfer for an ECD payment takes out less than the full amount owed.
- The Confirm Offer button is enabled once selections have been made.
Step 6: Confirmation Payment
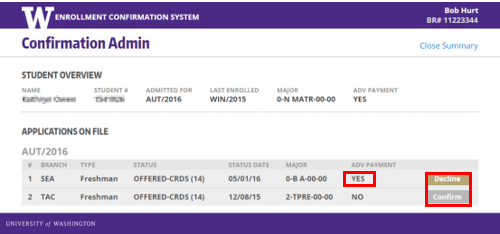
After confirming an application, the Advance-Payment field is now set to YES, and the update button is set to Decline.
Other applications can no longer be confirmed, so the Confirm button is disabled.
To decline the offer of admission, proceed to Step 7.
Step 7: Decline Offer
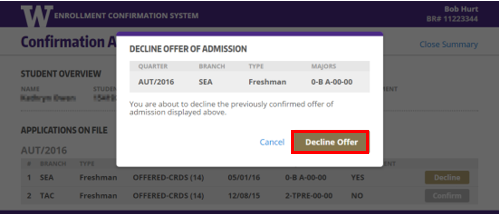
The Decline Offer of Admission window will appear when the Decline button is selected. Select the Decline Offer button to decline the application.
Step 8: Declination Update
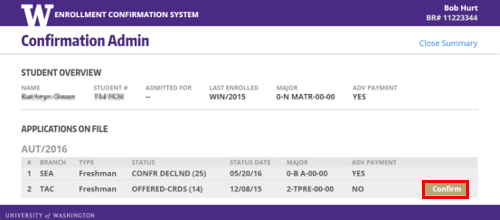
The Seattle first-year application can no longer be updated from the ECS. The Tacoma first-year application can once again be confirmed.